Categories
Blog News

55 today

Another year goes by, and as someone said, you are past half-time now… or if framed differently, you have survived 55 years already – plenty of other people don’t get that old.

Anyway, with my meager blender skills (still improving!) I managed to make this, still pretty happy about it that this at least I can already manage ! Perhaps a better 56 next year 🙂

Happy 55th birthday to everyone who also has his or hers anniversary this year !

Categories
Blog News

Wordfence is the max

I’ve been a happy user of Wordfence on all my WordPress blogs for years now, and I just realised that, while I did do a lot of word-of-mouth promotion for them to other blog people and clients, I never did publicly state how much safer I feel installing their default (free!) Wordfence firewall solution.

So this little blog post just to say that the Wordfence people are absolute good guys, letting people install a free solution, and providing even more improvements if you go for the paying solutions as a few clients have done over the year.

Thanks Wordfence !

Categories
Blog News

Happy New 2023!

I hope that you have a wonderful / better than before 2023 !

a diorama of a snowy cottage in the winter  dark, with lights sining from the windows.ski's are standing in front of the cottage, and the door is open. Made in blender.
Categories
Blog News

Twitter dying ?

I’ve been following the first week of Elon Musk taking over Twitter and all the changes he has implemented, including, apparently, firing half the workforce.

Moving to Mastodon is a solution, but then again, it’s totally different from Twitter (at least the last time I looked at it). Will have to look again soon.

I’m certain that there are other twitter clones out there being born as we speak…

Anyway. I’ve kept this blog up and running, with Twitter possibly going the way of the dodo, and Medium promoting paid content, it might be relevant to keep this blog around and start updating it again.

Curious to see what changes Elon will bring to Twitter next week.

Categories
Blog News

Roborock 2.4Ghz Wifi issues and some solutions

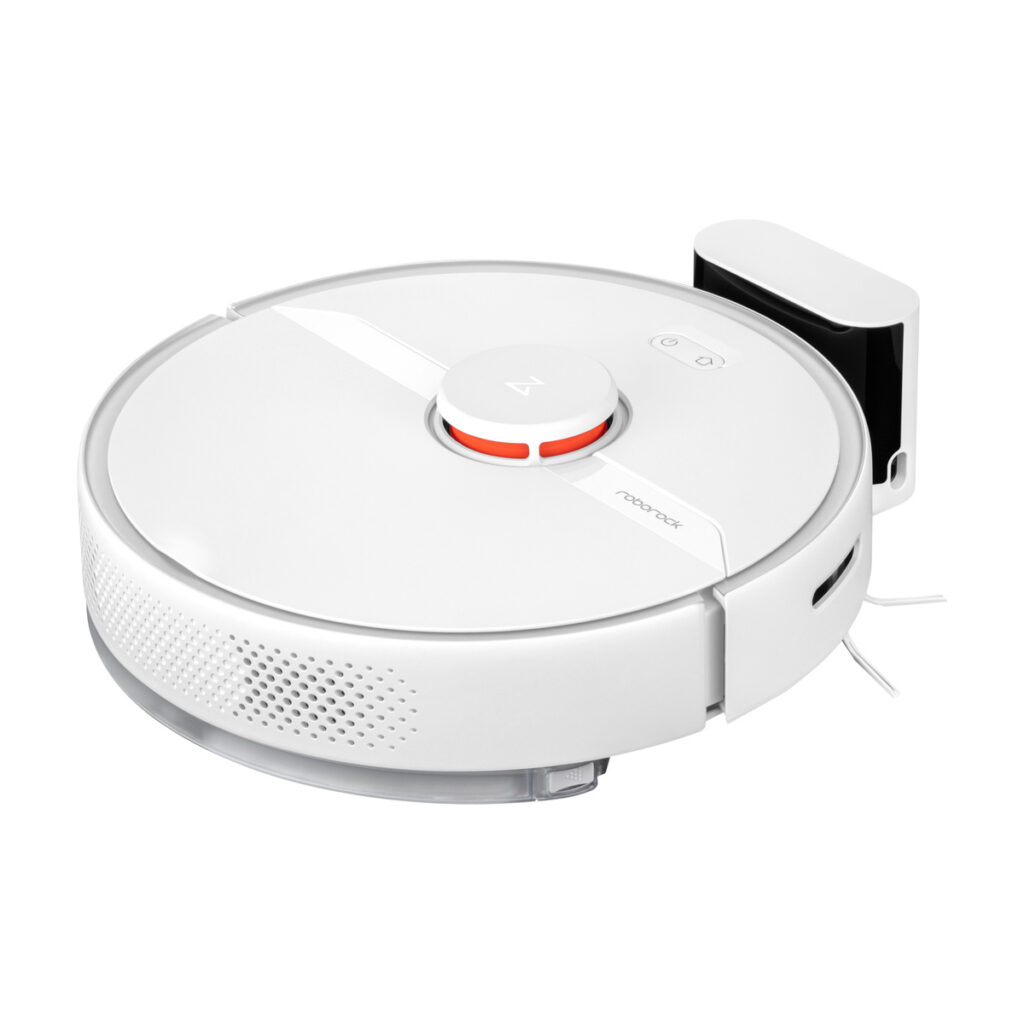
Roborock S6 Pure vacuum cleaner and it's charging station.

I just bought a Roborock S6 Pure vacuum robot. Having 2 cats and plenty of hair every day lying around we needed something that could do a quick clean every day.

While I’m vary happy with it’s performance, there is a WIFI connection issue that has been plaguing all Roborock S5 and S6 vacuum robots.

The Problem

The problem I encountered was that it was not that hard to get the Roborock S6 connected to the WIFI.

Just make sure that your WIFI password does not have any weird characters in them (symbols) as apparently your vacuum cleaners’ wifi programming can’t handle that.

However, once it was connected, I couldn’t really control it from my phone – it worked, but only infrequently. If I was further away, on the other side of the house, then it worked, maps got loaded. But only sometimes, with frequent timeouts and slow internet errors. Weird, but it got me thinking…

As officially stated in the manual, Roborock does not support the 5Ghz Wifi spectrum. And nowadays that is becoming more and more standard in routers. Most routers still support both though, sometimes separately, sometimes transparant for the user. Some of the new ones only support 5Ghz, although for your own comfort, you are better off with one that supports both.

At home I have got a router that supports both, and automatically chooses how to connect to a device depending on the throughput – I have the same network name for both radio networks, so my phone only sees the one network name, but depending on distance it’ll be the 2.4Ghz or the 5Ghz network (the higher the frequency, the faster the connection, but the harder it is to penetrate walls with the signal; so the further away you are, the better it is to use 2.4Ghz).

And that caused the problems : when I was farther away from the robot and the router, I got notifications; I could access the amp, etc… because my phone automatically used the 2.4Ghz radio network. But when I wanted to change settings I automatically went close to the Roborock. And closer to the router, so the phone switched again to the better 5Ghz connection. All without me knowing it. And normally that’s not a problem. However, when you are communicating with a 2.4Ghz device, that IS a problem…

Solutions

Here are some solutions to your problems :

  • First, check that your WIFI password does not contain any strange symbols.
  • Set your encryption scheme from WEP to WPA. Honestly, if you are still running WEP, you’re asking for troubles. WPA or WPA/2 is better protection as WEP nowadays is eminently hackable.
  • If you only have a 5Ghz network router : you’re out of luck. You can still use your Roborock, but without the smartphone interface. But…
    Do check in your router that your router perhaps DOES have 2.4Ghz, but it is turned off. For that you will need to access the router’s administrative interface, which is different for each type of router and how it has been setup… Time to start searching for that router installation manual ! If it is turned off, turn it on, and then setup that network and connect your Roborock to it.
  • You have a router that supports both frequencies, and both are active but using different network names : eg. “RadioGagoo24Ghz” and “RadioGagaa5Ghz” – make certain to use the 2.4Ghz network name and *not* the 5Ghz.
    Additionally, the device you are controlling may need to use 2.4Ghz network as well. I’ve read reports from people that did not manage to control their Roborock using their recent iPhones, but did manage to do that with an (older) Android phone (one which probably only has a 2.4Ghz radio).
  • For those dual router, you could, if you want to, disable the 5Ghz network and force everyone to use the old network. But you are losing out on high-speed downloads, and some devices nowadays like USB network antenna’s (for plugging into pc’s without a wifi card) only support 5Ghz…
  • You have a router that supports both frequencies and meshes them into one network name (which is what I have) – and you want to keep on using that solution for whatever reason : what worked for me was to enable the 2.4Ghz GUEST network (and only that one) and link the Roborock to that. I also allowed devices on that network to connect to my network.
    Afterwards I set my mobile phone back to my regular network, but I can still control the Roborock ! This works because
    a) the Roborock now has a dedicated 2.4Ghz network and can save information like maps. And because it can talk to my internal network,
    b) my phone can see it and communicate with it.

I hope you manage to get your Roborock working. And honestly, Xiaomi, if you are reading this, an upgrade on your next model to 5ghz is something that you really need to consider. The problems selling this to European and/or American customers will only get bigger staying on just the 2.4Ghz network.

Categories
Blog News

Installing HDX Media engine on Mac

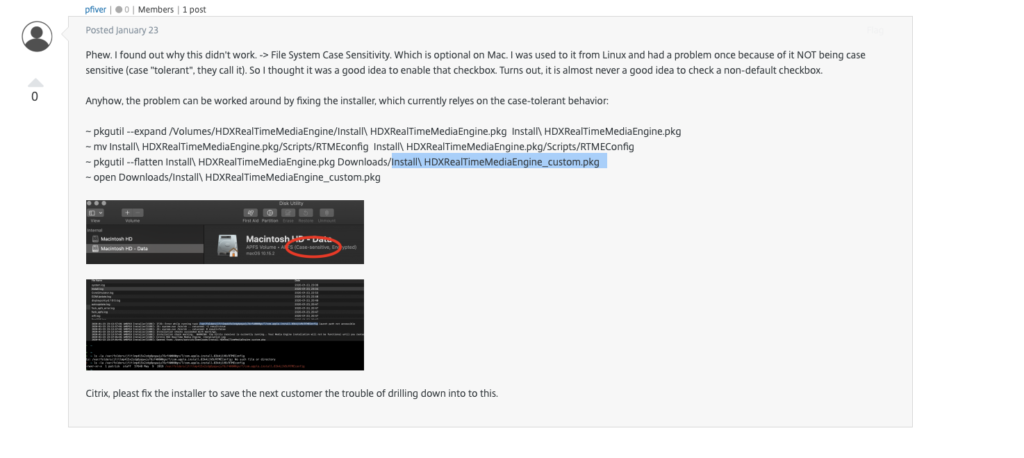
This is a post to quickly detail a solution to the problem of installing the Citrix HDX media engine plugin for the Citrix Workspace app on your Mac.

If it keeps insisting that No, your workspace app is not installed while it IS installed (because, you know, you are actually using it!) then the problem might be that the script inside the installation package is not executed.

Why is it not executed ? Because the script is stored with a typo that only shows up on a case-sensitive file-system. And most Mac files systems are NOT case-sensitive.

Here’s how to fix it :

~ pkgutil --expand /Volumes/HDXRealTimeMediaEngine/Install\ HDXRealTimeMediaEngine.pkg Install\ HDXRealTimeMediaEngine.pkg                                                 
~ mv Install\ HDXRealTimeMediaEngine.pkg/Scripts/RTMEconfig Install\ HDXRealTimeMediaEngine.pkg/Scripts/RTMEConfig             
~ pkgutil --flatten Install\ HDXRealTimeMediaEngine.pkg Downloads/Install\ HDXRealTimeMediaEngine_custom.pkg  
~ open Downloads/Install\ HDXRealTimeMediaEngine_custom.pkg

Basically, it unzips the .pkg file (similar to .zip) , unzipping it, renaming a file in there by using the unix mv (move) command so that the script will run correctly, and then zipping it up again under another name.

Running that custom package (in the script above it’s saved in Downloads) will normally allow you to get this to work.

I found this in an online bulletin board from the HDX version 3 versions back. Apparently it’s still not fixed.

Categories
Hardware

Using the Fritz!Wlan 1160 repeater to increase my wifi range [review]

Why I need a repeater and perhaps you as well

Recently with the hot weather we wanted to sit in our garden, but nowadays we take a tablet with us instead of a book.

Unfortunately the telenet router is all the way on the other side of the house, so the range is about nil and zilch once you go 2 meter further than our backdoor. So I needed a repeater, which is basically an extension for your wifi and is normally totally transparant to your tablet or laptop or smartphone.

In detail: your router talks to the wifi repeater (via wifi, no develo in sight here!) and the repeater is just a client on the network.
The repeater broadcasts the exact same wifi access name as your router (hence the name of the thing), and as it is closer to the devices that want to connect to the wifi, those devices use the more powerful radio of the repeater. Invisible to them, the repeater relays all those requests back to the router.

This is of course not optimal for speed but at least a slower connectivity is better than no connectivity. And it really depends on where you put the repeaters (yes, you can install multiple ones that connect to each other!). One caveat is that they need to be somewhere close enough to the router so that there still is a reasonable connection, but far enough that your devices farther away can still reach them.

So I recently purchased the Fritz!WLAN Repeater 1160, which I read some good comments about on tweakers and can be had for about 70 euros or slightly less.

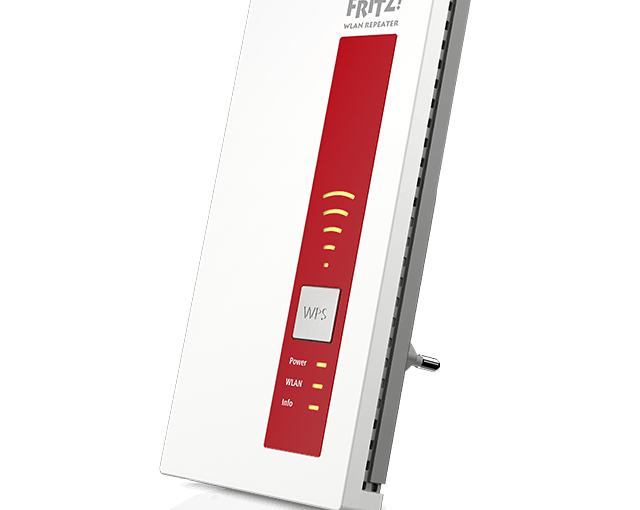
It’s a stylish flat box with some red on it and some symbols so it is not the most un-noticable item in your room. If you can tuck it away in some powersocket nobody is using but still have good wifi connectivity, the better. On the box it says “Gigabit Wifi” but that all depends on how you configure it and how far away it is from the router (see above for more detail).

The front is actually quite well thought out.

You have a WLAN symbol, with below it the WPS button and under that status lights for power, WLAN and info.

The WLAN symbol lights up bars according to how strong the connection is to the router. In my case, I get about 3 bars, which is very good.
As such it gives you a rough estimation of how good the repeater can reach the router.

SETUP

Setup was so easy that I was actually doubtful that I done it :
1) plug it in somewhere close to the router
2) press the WPS button on your router
3) press the WPS button for 5 seconds on the repeater
4) done !

Connections can be either on 2.4Ghz or 5Ghz, or a combination of both, where you receive 2.4 and send on the 5 Ghz. This can help with the throughput speed, if you set it up right.

You can configure it manually if you don’t have a router with WPS, but for me WPS worked immediately. I actually reset it to factory settings just so I could try the other way as well. There are actually only 3 actions you can do with the device without going into the config screen :
– press the WPS button for 1s to turn the WIFI on or off
– hold the WPS button for more than 5 seconds : start the WPS handshake sequence
– hold the WPS button for more than 15 seconds : reset to factory settings

There was one problem that I had : once connected via wps to the router, I could not connect to the local fritz.repeater admin page that is described in the manual for further configuration. The only way I could access it was right after resetting it to factory settings. Once connected to the router the page was no longer accessible.

Performance

Surprinsingly good performance, and very stable. Both in seamlessly connecting to it and in the throughput to the router.
Absolutely no problem to watch youtube on the tablet all the way in the back of the garden !

So I heartily recommend this device if you want to extend your wifi for a low price !

Categories
Hardware

G-Sync setup not showing in your menu ? Colors on your Dell S2716DG not right ?

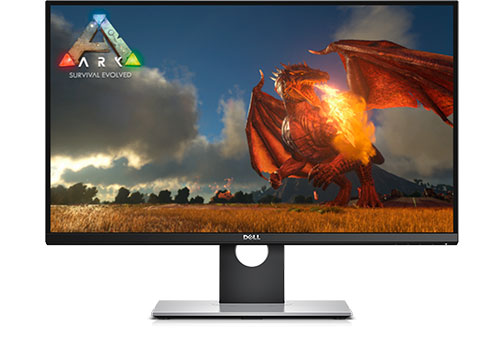
I just bought this sweet, sweet new DELL monitor : the S2716DG monitor with G-Sync. This monitor has a TN panel that’s very good and can run at 144hz in G-Sync mode with selected nvidia cards like my GTX970.

G-Sync mode allows your card and your monitor to synchronize display refresh rates to the GPU in your GeForce GTX-powered PC, eliminating screen tearing and minimizing display stutter and input lag. The result in a game is no tear or blurry images, just buttery smooth gaming experience with crisp detail. I’ve tried Battlefield 1 before and after G-Sync and the experience is incredible.

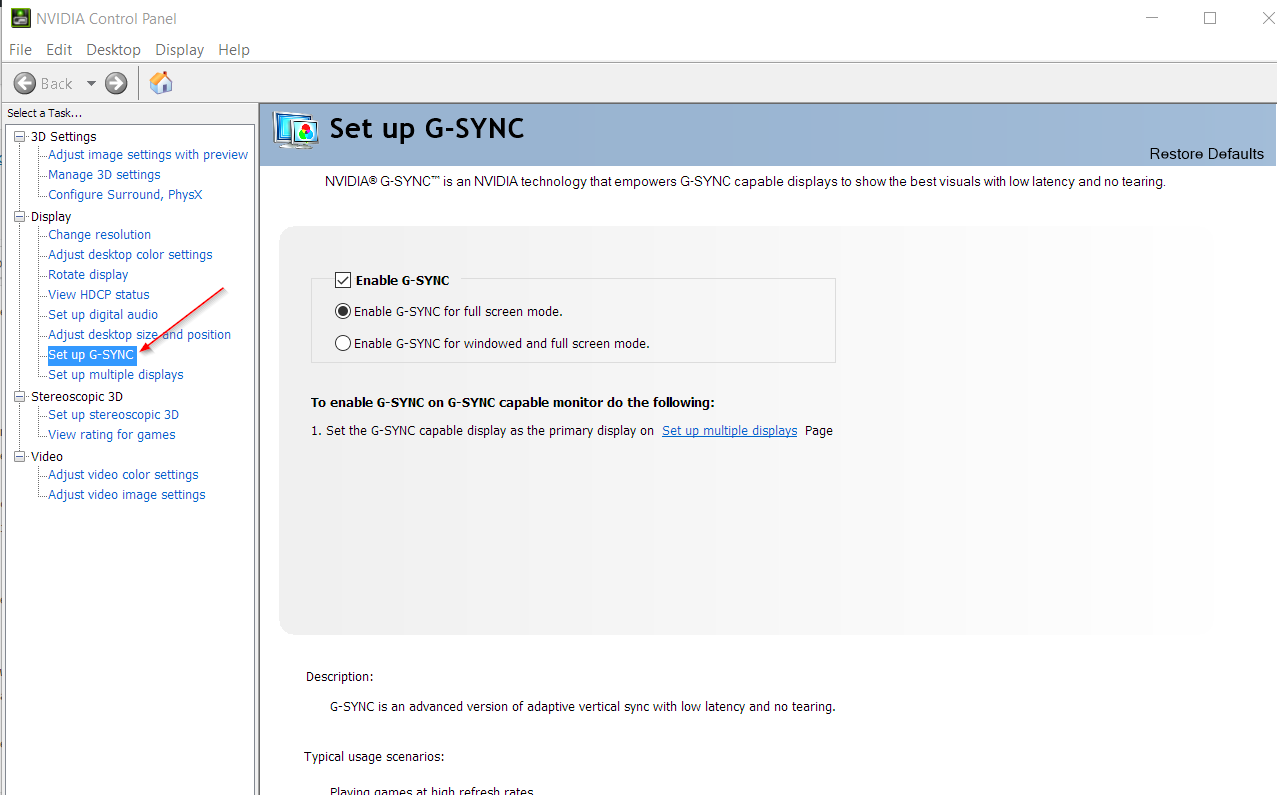
One thing that bothered me was that when I initially searched on how to enable G-Sync, I could not find the menu entry in the nvdia control panel. I reinstalled all drivers and did a clean install of them just to be certain, but nothing changed. No “Set up G-SYNC” menu option. This really vexed me.

The solution seems to be a simple one, too simple really : just take out the displayport cable out of your screen or graphics card (you did use the dp cable to connect your screen, right?), then wait a moment, and plug it back in. After a second of hesitation, the “Set up G-Sync” menu option suddenly appears in the nvidia control panel. Problem solved !

The build of the screen itself is great, with small bezels, and can easely be lifted or lowered to the correct setting, as well as tilted or turned. The foot it connects to is solid and has a quick-release button.

But the default factory settings make the screen somewhat bright and harder to read than it should be. And the menu panel of the monitor doesn’t allow you to change the gamma settings, however with the nvidia control panel you can set it up correctly.

I found some settings on Reddit that I tried and quite liked. They are here for my own recall and perhaps your help should you want to try them out :

Nvidia Control Panel>Adjust desktop color settings:

  • Brightness-50% SAME
  • Contrast-50% SAME
  • Gamma-0.75% DIFFERENT
  • Digital vibrance-60% DIFFERENT
  • Hue-0 SAME

Click APPLY to save the settings.

DELL Monitor settings:

  • Brightness-30% DIFFERENT
  • Contrast-75% SAME
  • Color > Custom Color: R-97% G-99% B-96%

This definitely made the screen colors more vibrant and noticeable. The screen is a bit pricey, but not as much as the others, and the results are very good.

Categories
Blog News

So true. How we get older…

“We do not grow absolutely, chronologically. We grow sometimes in one dimension, and not in another; unevenly.
We grow partially.
We are relative.
We are mature in one realm, childish in another.

The past, present, and future mingle and pull us backward, forward, or fix us in the present. We are made up of layers, cells, constellations.”
 ― Anaïs Nin

Categories
UX Prototyping

How to integrate an Axure prototype with a live chat application using Flask and SocketIO.

I recently created a prototype sales flow in Axure that contained a dummy chat button. One of the next requests for prototyping that I received was on testing the actual activation of the chat button and the subsequent screens after. However, I went slightly further than only prototyping the chat button interaction.

Why not add live chat to it so you can test end-to-end ?

Since participating on a few U-lab sessions organised by my colleague, I firmly believe that the more realistic your environment, the better the tester can focus on the actual proces that is being tested. It doesn’t need to look exactly right (although that’s fine too) as long as most or all of the functionality is there. Otherwise a tester can become focused on an missing element and not on the actual prototype.

For instance, the sales flow I previously created contains a general conditions text. At first I just added a page to the prototype so the user could at least click on the general conditions link, but I left the actual page empty.

One or two test users found the empty page, and remarked on it repeatedly – it clearly bugged them, even though it was only a very small part of the flow they were asked to test. So I quickly added the beginning of the actual text to the page. Subsequently there were no more remarks.

So instead of using pre made ‘fake’ speech bubbles to ‘make pretend’ that there was a chat session going on, I got to thinking about my previous experiences with Python and Flask and the way you can use those tools to create a website with very little effort.

Wouldn’t there already exist a way to easily setup a live chat server and integrate it with the Axure sales flow prototype ?

A quick google search later I had found a simple tutorial (made by the wonderful knowledgeable Flask-guru Miguel Grinberg) on using websockets with Flask and Flask-SocketIO, setting up a simple chat application server that could be reached by surfing to the page, allowing actual client-server communication using a javascript socket.io library for the webclient.

The backend : live chat application using the Flask micro-framework

Let’s first describe the ‘backend’ : I used Flask together with some extra libraries like Flask-SocketIO to create the chat server.

[Flask is what is called a framework, written in Python, that allows you to code a web application using only a few tools and templating languages that have been configured to work together. It’s called a micro framework because it allows you to work fairly freely, not confining you too much. A full framework is much more rigid in using databases, templating languages, etc]

Soon after, I had a chat server running that allowed you to start up a browser, enter a room and type in a line of text, hit enter, and have it displayed on two different sessions that were in the same ‘chatroom’.

As long as you are on the same (wireless) network, you can visit the server and chat together in a room. So the U-lab organiser or a third party can run the ‘server’ on his mac, and the tester can use a browser on another device to visit the server url (using another id) and we have a live chat going between the two parties.

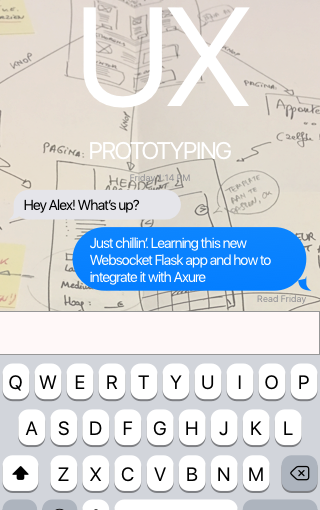
As I wanted to test the mobile view of it, I modified the provided example to use Bootstrap and css-styled it so that the chat lines are not shown as simple text but as speech bubbles, similar to Messenger. If the user entering the chat line is the same as the user it is being shown to, it is shown on the right side of the screen, else it is shown on the left.

Also, I removed the first ‘login’ screen from the example provided so I could call the chat screen up from within the Axure prototype based on url parameters so the user does not have to login any more.

Obviously this had an impact on using sessions (which is being used by the socket emitters to know who is emitting what), as these sessions were established in the separate login screen.

As I didn’t want to rewrite the whole code and only had a few days to set this up, I made it so that the sessions are actually created by the url parameters when the chat page is called.

The result is something that I consider to be unsafe for real live applications, but is ‘Good Enough’ to use for testing a prototype in a U-Lab.

The frontend : Integrating the Axure prototype with the chat app

The integration with the Axure prototype is fairly easy if you want to link on the desktop : you can code up an action to call an external url when clicking on an element, and decide wether to call this up in a new window or in the current window.

I first tried integrating the chat directly into an inline frame that was inside a dynamic panel, however once you use an inline frame you then lose all the session information and you can no longer chat. So it needs to open in a new window/tab.

However, I wanted to test a mobile prototype, and coupled with the above, this caused some fairly unique problems :

  • the user is in the middle of a sales flow, so if (s)he needs to ask for help, (s)he should be able to get back to what (s)he was doing, without restarting the sales flow – so I need to open up the chat application in another mobile window
  • we usually install such a web app onto the home screen, so that Mobile Safari opens up full-screen. However, doing that makes it so that a new window created from there cannot be closed – you can only ‘return to the app’ which restarts the app, which is not what we want
  • using the javascript command window.close() on IOS to close a chat window and return to the prototype is problematic and not something that works consistently. Some browsers for example restart the whole prototype, or refuse to close the window at all. In the end, I could only use it with the ‘Brave’ browser, a fairly new browser for IOS

In the end, to keep everything on the same server, I published an export of the Axure prototype to html and stored those pages in the local chat server under the static directory (flask can easily serve static files as well).

Conclusion

My prototype can call up the chat in a new window, and the user can be returned to it. It is a worthwhile addition to actually see people start up, use, and end the chat.

Templating the chat page itself is fairly easy, it’s just bootstrap css that you can edit.

The chat server is however more finicky than it should be – if the computer hosting the chat server goes to sleep, it is best to restart the chat server. Plus caching by browsers means that if you do make any changes, you need to make sure that the cache in the (desktop) browser is refreshed. Or you keep wondering why your changes do not become visible…

The actual integration with the prototype was more difficult because I was integrating with a mobile prototype. I’ll have to look into this on how to do a better integration next time.